– Actually this post is old but I find the info still useful –
Along this post I will describe how to configure the beaglebone blue to connect to a router automatically and install the real-time kernel patch.
First steps
Connect the board to an USB port of your computer and after a few minutes of power up you can login through ssh session. For this write in a terminal:
ssh debian@192.168.7.2
You have to type a password. If it is the first time you can use the default password, which is shown after login [temppwd]. I’ll recommend you to change it:
sudo passwd debian
You will see something like that:
[sudo] password for debian:
Enter new UNIX password:
Retype new UNIX password:
passwd: password updated successfully
Connect to your router through WiFi
We are going to use connmanctl in order to scan and establish connection. After write the command you will see that the prompt is changed. Also there is an error but don’t worry about it.
connmanctl
Error getting VPN connections: The name net.connman.vpn was not provided by any
connmanctl>
Now you have to scan for wireless net and choose yours:
connmanctl> scan wifi
Scan completed for wifi
connmanctl> services
    FRITZ!Box            wifi_##_#####_managed_psk
	EasyBox              wifi_##_#####_managed_psk
    o2-WLAN              wifi_##_#####_managed_psk
Then activate the agent mode, connect to your net and enter the password:
connmanctl> agent on
connmanctl> connect wifi_##_#####_managed_psk
...
passphrase?
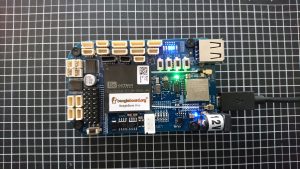
A green led will be on:
If you want to know more about connmanctl type help or see wiki.archlinux.org/index.php/Connman. To exit of connmanctl press ctrl+C.
We are almost done, it remains only to configure an automatic connection.
Automatic connection
Here you have to uncomment (remove #) a few lines in the file /etc/network/interfaces. I will use vim:
sudo vim /etc/network/interfaces
This is how you have to see:
##connman: WiFi
#
connmanctl
connmanctl> tether wifi disable
connmanctl> enable wifi
connmanctl> scan wifi
connmanctl> services
connmanctl> agent on
connmanctl> connect wifi_##_#####_managed_psk
connmanctl> quit
Finally we have to proof if everything is OK. Power off the beaglebone typing:
sudo poweroff
We could use another power supply instead of an USB port to ensure a connection is through wifi. I have used my phone’s charger.
After awhile you will see the green led on. That means it works! Congratulations!!!
Now you can connect to your beaglebone typing:
ssh debian@beaglebone
Note that the next time you login using ssh, there will be an error message. You only have to write the command, which is shown on that message.
RT kernel patch
Here we’ll set the clock to 1 GHz and to install RT Kernel. This part is based on Mirko Denecke instructions.
- Check for updates and install them:
sudo apt update
sudo apt upgrade -y
- Install utilities:
sudo apt install -y bb-cape-overlays cpufrequtils
- Now we are going to set clock to 1 GHz and update scripts, which are necessary for RT Kernel installation:
sudo sed -i 's/GOVERNOR="ondemand"/GOVERNOR="performance"/g' /etc/init.d/cpufrequtils
cd /opt/scripts && sudo git pull
- Maximize the micro SD card’s existing partition:
sudo /opt/scripts/tools/grow_partition.sh
- Install RT Kernel 4.9:
sudo /opt/scripts/tools/update_kernel.sh --ti-rt-channel --lts-4_9
- Specify device tree binary to be used at startup and reboot:
sudo sed -i 's/#dtb=/dtb=am335x-boneblue.dtb/g' /boot/uEnv.txt
sudo reboot